Content
Control your incoming call flow when you’re away or busy with a permanent call forward. Use time schedules to give you more flexibility, for example, have your calls forwarded straight to your mobile during the day with an after hours forward to your after hours voicemail box.
Terms:
- Call Forward Busy: Enables Subscribers to redirect calls to another number when an incoming call receives a busy response.
- Call Forward No Answer: Enables Subscribers to redirect calls to another number when an incoming call is not answered within a specified time frame. Configurable via feature code, voice IVR and within the CloudPBX.
- Call Forward Always: Enables a user to redirect all incoming calls to another phone number. Configurable via feature code, voice IVR and within the CloudPBX.
- Auto scheduling: Automatic such as recurring meeting or for after hours support.
- Emergency Diverts: If for what ever reason your VoIP data link is taken offline, use Call Forwardingto quickly divert all incoming phone calls to alternate land-line or mobile contacts.
Quick Guide
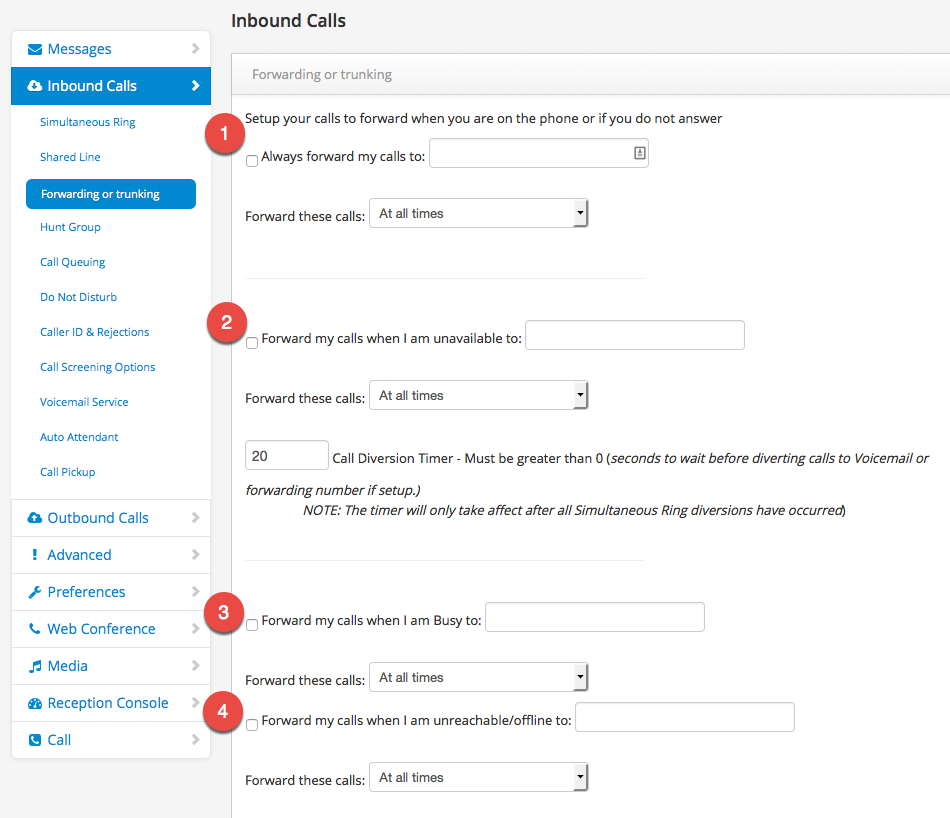
Step 1: Call Forwarding
- Log into https://now.tel2.co.uk
- Cloud PBX >> Select number.
- Select Inbound Calls > Forwarding or trunking
- Set your Call Forwarding preferences including numbers and time schedules
- Click Save to update your settings.
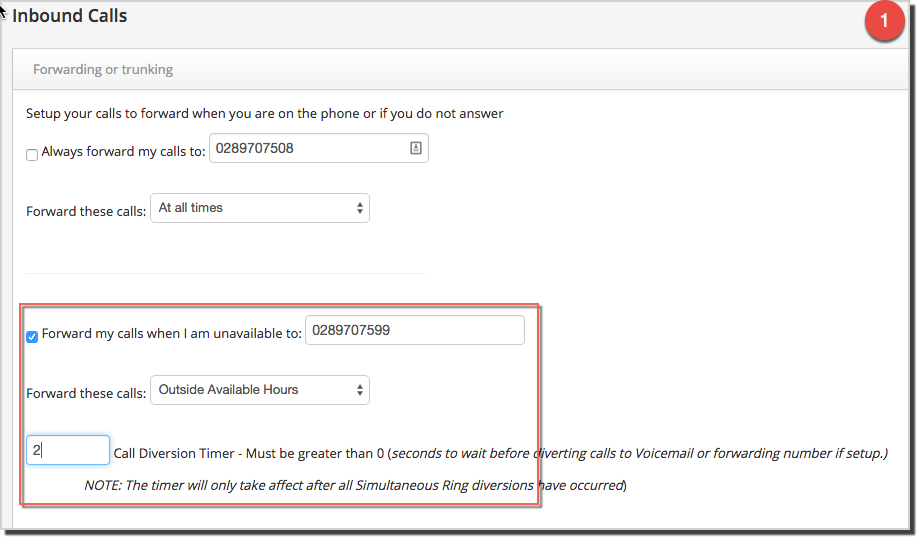
Step 2: After hours Voicemail
- Log into https://now.tel2.co.uk.
- Cloud PBX >> Select number.
- Select Inbound Calls > Forwarding or trunking
- Set Forward my calls when I am unavailable to: (set number)
- Set Forward these calls: Outside Available hours
- Call Diversion time: set to 2
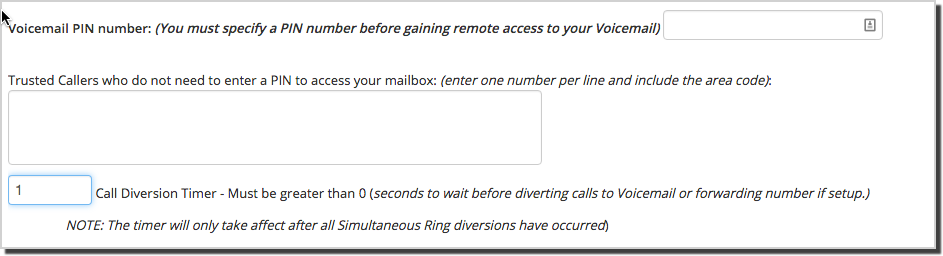
Inbound Calls | Voicemail
- Goto nominated After Hours VoiceMail number (Inbound calls | Voicemail Service)
- Record Voicemail UNAVAILABLE message
- Call Diversion Timer: Set to 2
Inbound Trunking Options
By default inbound calls are delivered to a phone which has logged in against that same number. However, some customers prefer to have multiple inbound numbers terminate on a single logged-in device. This setting allows you to send inbound calls for this phone number to the registration or login of a different number on your account. By using this option you can create one or more inbound trunks for your incoming calls. If you enter a number here which is not on your account – then this setting will simply be ignored and removed. The number format should be the same as the registration ID. e.g. 442034567890
Step 2: Inbound Trunking
- Log into https://now.tel2.co.uk
- CloudPBX | Inbound Calls > Call forwarding or trunking
- Select Inbound trunk number
- Log into each restricted line and use Inbound trunking to pointing each required line to your terminated trunk DID.
